
The Complete Guide to Machine Vision Illumination Techniques
Lighting is the highest-leverage decision in a machine vision system and the one most often rushed. This guide walks through the eight techniques and light types we reach for most, bright field, dark field, backlighting, coaxial, ring, bar, dome and structured light, what each one does and when to use it.
Ask an experienced vision engineer what makes a system work and lighting comes up before cameras, lenses or software. The reason is simple. Lighting is what creates the contrast your system depends on. Get the feature you care about to stand out from everything around it and the rest of the job becomes straightforward. Fail to do that and you spend the rest of the project fighting the software to recover detail that better lighting would have handed you for free.
There is no single best light. The right answer comes from the part, the feature and the surface it sits on. The eight approaches below are the core toolkit. Most real inspections combine two or three of them. For each one, here is how it works, what it is best for and what to watch out for.
What this guide covers
Bright field
Bright field is the default, the one most people picture first. Light is aimed at the part from the front, usually at a fairly steep angle. A flat surface reflects it back toward the camera and reads bright. Anything that disturbs the surface, a scratch, an edge, a dent, scatters light away and shows up dark against the bright background. It is quick to set up and suits a wide range of general inspection. The watch-out is specular glare. On a shiny or curved surface, bright field can throw hotspots that blow out detail, which is where diffuse or coaxial light earns its place.

Best for General surface and print inspection on reasonably flat, matte parts.
Watch out Hotspots and glare on shiny or curved surfaces.
Dark field
Dark field is bright field turned on its head. The light comes in from a low, grazing angle, almost parallel to the surface. A flat area reflects it away from the camera and stays dark. Only features that stand up or cut into the surface, engraving, embossing, edges, surface scratches, catch the light and scatter it back into the lens. They appear bright against a near-black background. It is the go-to for reading engraved or embossed marks and for finding the surface defects a flat front light washes out.

Best for Engraved, embossed and laser-marked codes, scratches, edges and surface texture.
Watch out Needs the feature to have relief, with little use on flat, featureless surfaces. Curved surfaces are also more complex.
Backlighting
Backlighting puts the light behind the part with the camera in front. The part blocks the light and appears as a crisp dark silhouette on a bright background. It throws away all surface detail and gives you the one thing silhouettes do better than anything, clean high-contrast outlines. That makes it the first choice for dimensional measurement and gauging. It is equally strong for outline and shape, for holes and gaps and for simple presence checks. In particularly high-precision metrology systems, a collimated backlight can give even better results.
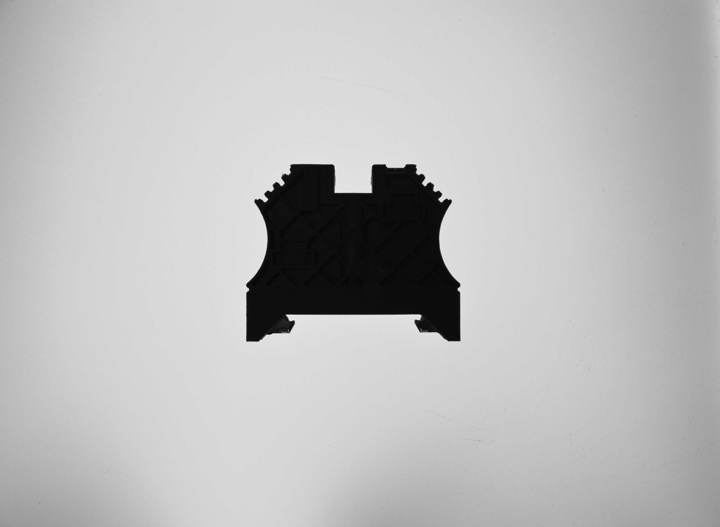
Best for Measurement and gauging, outlines and shape, holes, gaps and presence checks.
Watch out Shows the outline only, with no surface or top-face detail.
Coaxial, on-axis
Coaxial light uses a beam splitter to send light straight down the optical axis of the lens. It strikes a flat surface head on and reflects straight back. Because the light is perpendicular, it lights flat specular surfaces evenly with none of the hotspots a ring or bar would create. Features that sit at any other angle go dark. It is made for flat, mirror-like parts, wafers, circuit boards, polished or plated metal and glass, where you need even illumination and want etched or engraved marks to stand out.

Best for Flat specular parts, wafers, circuit boards, polished or plated metal, etched marks.
Watch out Flat parts only. Any height or tilt reflects away and reads dark.
Ring light
A ring of LEDs that mounts around the lens and lights the part from the front, roughly along the camera axis. It is the most common light in machine vision for good reason. It is compact, simple and even enough for a great many jobs on reasonably flat parts close to the camera. The watch-out is the same shiny-surface problem as bright field. A ring can leave a distinctive circular reflection. When glare is the enemy, a diffused or dome light is the better answer.
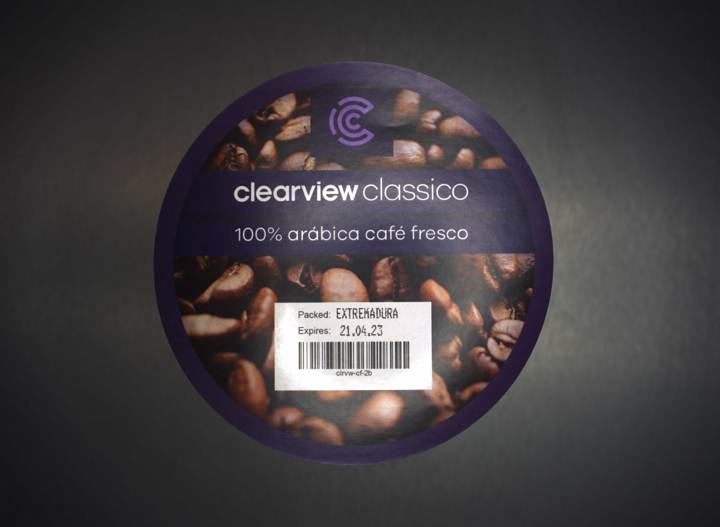
Best for General-purpose frontal lighting, reasonably flat parts near the lens, quick set-ups.
Watch out Ring-shaped reflections and glare on shiny surfaces.
Bar light
A bar is a straight line of LEDs. Its strength is flexibility. Angle one in low for a dark field effect, aim it square for even front light, or pair two or four around the part to balance shadows. Bars scale to large fields of view. They are the standard choice for line scan, where a bright, even line of light is exactly what the single row of sensor pixels needs.

Best for Large areas, adjustable-angle lighting, paired arrays and line scan.
Watch out A single bar lights unevenly and usually wants pairing or careful angling.
Dome
A dome light, sometimes called a cloudy day illuminator, bounces LED light off the inside of a hemisphere so it reaches the part softly from every direction at once. That near-shadowless, glare-free wash is the answer to the hardest surfaces in vision, shiny, curved, uneven or crinkled, where any direct light would hotspot. Think of reading a code off a curved foil pack or a dented can.

Best for Shiny, curved, uneven or reflective surfaces, plus codes on cans, foils and domed caps.
Watch out Bulky and needs space over the part. Lower intensity than direct light, which can limit line speed.
Structured light
The others light a part so a 2D camera can see it better. Structured light does a different job. It measures shape. A projector casts a known pattern, often a laser line or a set of fringes, onto the part. A camera viewing from a different angle sees that pattern deform over the surface. From the deformation the system reconstructs height and a 3D profile. It is the basis of a lot of 3D inspection, from checking weld beads and glue lines to measuring flatness, volume and warpage.
Best for 3D height and profile, flatness, volume and weld or bead inspection.
Watch out For some 3D jobs time of flight or stereo vision suit better. Very shiny or dark surfaces also challenge the pattern.
When to use each at a glance
| Technique | Best for | Watch out |
|---|---|---|
| Bright field | General surface and print inspection on reasonably flat, matte parts | Glare and hotspots on shiny or curved surfaces |
| Dark field | Engraved, embossed and laser-marked codes, scratches and edges | Needs surface relief, little use on flat features. Curved surfaces are more complex |
| Backlighting | Measurement, gauging, outlines, holes and gaps | Outline only, no surface detail |
| Coaxial | Flat specular parts, wafers, boards, polished metal, etched marks | Flat parts only, any tilt reads dark |
| Ring light | General frontal lighting, reasonably flat parts near the lens | Ring reflections and glare on shiny surfaces |
| Bar light | Large areas, adjustable angle, pairs and arrays, line scan | A single bar lights unevenly, usually wants pairing |
| Dome | Shiny, curved or uneven surfaces, codes on cans and foils | Bulky, lower intensity, needs space over the part |
| Structured light | 3D height and profile, flatness, volume, weld and bead | Time of flight or stereo can suit better, shiny surfaces challenge it |
How to choose and combine
Most real applications do not use one light. They layer two or three, a backlight for the outline and a front light for the face, or a dome to kill glare with a dark field bar to lift a mark. The choice falls out of the part and the feature, the surface finish, whether you are measuring a shape or reading a mark, the geometry, the working distance and the line speed. The wavelength to use is also worth considering, as different features may show up better or worse under different colours of light.
The fastest route is to start from the feature you need to see and the surface it sits on, then test on your own parts. Our illumination selector tool walks you through a handful of questions and points you at the families worth trying. Our applications engineers are happy to help you prove it. If you want the wider case for taking lighting this seriously, our note on why machine vision lighting is so often wrong goes further.
Explore our illumination range and try the selector tool
Start from your part and your feature. The illumination selector asks a handful of questions and points you at the lighting families worth testing. Browse the full range or talk to our engineers when you want a second opinion.